Today I want to talk about a recent problem I had with my Windows 11 computer. We’ve all been there – eagerly anticipating the enhanced performance a sleek M.2 SSD can bring to our systems, only to face disappointment when it doesn’t cooperate. I can relate to that feeling.
However, there’s no need to fret. Following some thorough investigation and tinkering,I’m here to lead you through a series of steps aimed at potential SSD data recovery and addressing any issues you may encounter.With these pointers, you’ll hopefully have your M.2 SSD up and running smoothly on your Windows 11 computer. Also, you can always hire a SSD data recovery Sydney as they understand the whole situation better.
Check the Compatibility
Compatibility problems may arise with new hardware, such as M.2 SSDs, if your BIOS/UEFI firmware is outdated. To address this, visit your motherboard manufacturer’s website to access the most recent firmware updates and detailed instructions for their installation. Remember, updating the BIOS requires precision, as errors during the process could potentially render your motherboard inoperable. Hence, it’s crucial to meticulously adhere to the provided guidelines. It’s critical to check compatibility because some motherboards may not support particular sizes or connections.
You can locate a list of compatible M.2 SSDs on the manufacturer’s website or in the user manual for your motherboard to determine compatibility. Your SSD might not function with your motherboard if it is not listed.
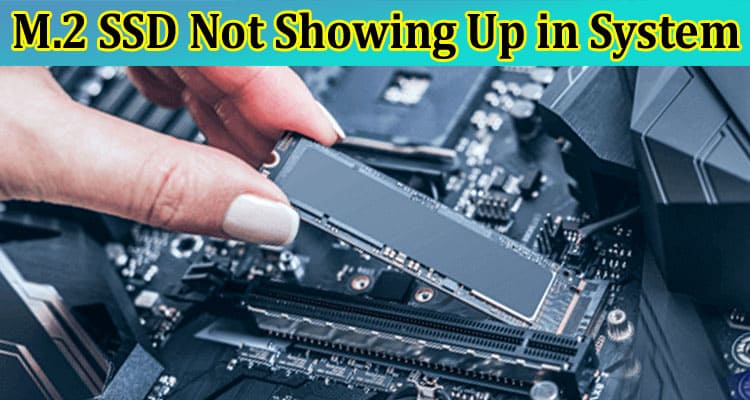
Secure Connection
It’s time to see the physical installation of your M.2 SSD if it is compatible but is still not being recognised. Open the case, turn off your computer, and unhook the power cord. On most motherboards, the M.2 slot is situated next to the PCIe slots. Find it. Make sure the M.2 SSD’s notches line up with those in the slot before carefully inserting it at an angle.
Once the SSD is completely positioned in the slot, gently press the SSD into place. Avoid pushing it in; it should slide in easily. Use the mounting screw that came with your motherboard to hold the SSD in place once it has been correctly inserted.
Enable M.2 Slot in BIOS
The data recovery experts say that even if your M.2 SSD is physically installed, the BIOS or UEFI may not have it enabled. Some motherboards deactivate some hardware components by default, and the BIOS serves as the interface between your hardware and the operating system.
Restart your computer and press the required key (usually Del, F2, or F12) during the startup process to enter the BIOS/UEFI settings. Once within the BIOS, select “Advanced” or “Peripherals” and search for a setting for M.2 configuration or storage. The M.2 slot where your SSD is inserted should be set to “Enabled.”
Update BIOS/UEFI Firmware
Having an outdated BIOS/UEFI firmware could result in compatibility problems with modern hardware such as M.2 SSDs. To avoid this, visit the website of your motherboard’s manufacturer and obtain the most recent firmware updates along with detailed application guidelines. It’s important to note that BIOS updates require careful handling, as errors during the process may lead to your motherboard becoming inoperable. Thus, it’s crucial to meticulously adhere to the provided instructions.
Check Disk Management
Windows often fails to give the recently installed M.2 SSD a drive letter. Right-click the Start button, choose “Disc Management,” and look for your SSD in the list of discs to see if the system has detected it. If it shows up but has no corresponding drive letter, it will display as “unallocated” or “offline.”
Right-click the SSD and select “Change Drive Letter and Paths,” after which click “Add” and pick a free drive letter to fix the issue. After that, select “OK” to give your SSD the drive letter.
Driver Updates
Driver conflicts and missing or outdated drivers can stop the system from recognising your M.2 SSD. Expand the “Disc drives” area of the Device Manager, search for “Device Manager” in the Start menu, and look for any warnings or errors pertaining to your SSD there.
In the event of a problem, right-click the SSD, choose “Update Driver,” and then “Search automatically for updated driver software.” Windows will make an effort to locate and install the most recent SSD driver.
Disable CSM (Compatibility Support Module
Incompatible hardware, like as M.2 SSDs, may occur if your motherboard supports UEFI (Unified Extensible Firmware Interface) but also has the Compatibility Support Module (CSM) activated. Older operating systems that do not support UEFI can be used with the CSM, which is built to enable compatibility.
Access the BIOS/UEFI settings (as was previously described), go to the “Boot” or “Boot Configuration” section, and uncheck the CSM box.
Check for Physical Damage
After attempting all the aforementioned techniques, if your M.2 SSD is still not identified, carefully examine the SSD for any indications of physical harm. Check the PCB for any damage, such as bent pins. Contact the manufacturer’s support for additional advice or a potential replacement if you suspect physical damage.
In the End..
It’s important to note that troubleshooting often involves a process of trial and error. Patience and careful adherence to instructions are key. With persistence, you’ll likely succeed in getting your M.2 SSD up and running. Once you do, you’ll be able to fully enjoy its impressive speed and enhanced system performance on your Windows 11 PC.